Connect Twilio
Rindee is bring-your-own-carrier. Your number stays on your Twilio account; Rindee only handles the call leg. Nothing is ported, and you can stop calls reaching Rindee with a single switch.
Rindee provisions the Twilio side for you — an Elastic SIP Trunk, its credentials, and the origination URL that makes inbound work. Budget about 10 minutes.
Before you start
Section titled “Before you start”- A Twilio account with at least one number on it.
- Your Account SID and Auth Token (Twilio Console home page).
- The Rindee dashboard open at app.rindee.ai.
1. Copy your Twilio credentials
Section titled “1. Copy your Twilio credentials”From the Twilio Console home page, copy the Account SID (starts with AC) and
reveal and copy the Auth Token.
Rindee stores both encrypted and uses them to read your numbers and to create the SIP trunk in step 4. Neither is exposed back to the browser after saving.
2. Add the provider in Rindee
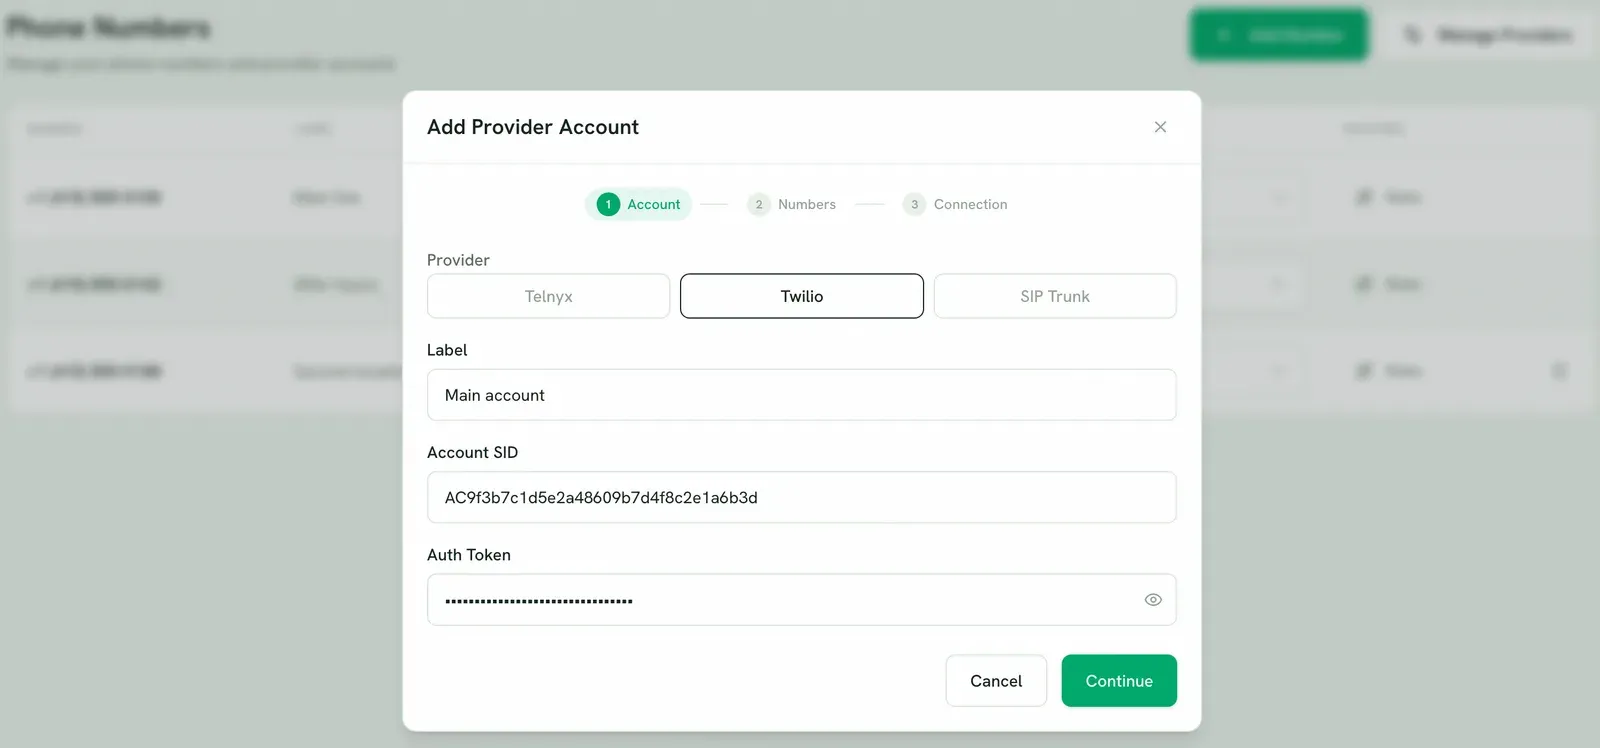
Section titled “2. Add the provider in Rindee”Open Numbers in the sidebar, then Manage Providers → Add Provider.
Choose Twilio, give the account a Label (e.g. Main account — for your own
reference when you have several), paste the Account SID and Auth Token, and
press Continue.
3. Select your numbers
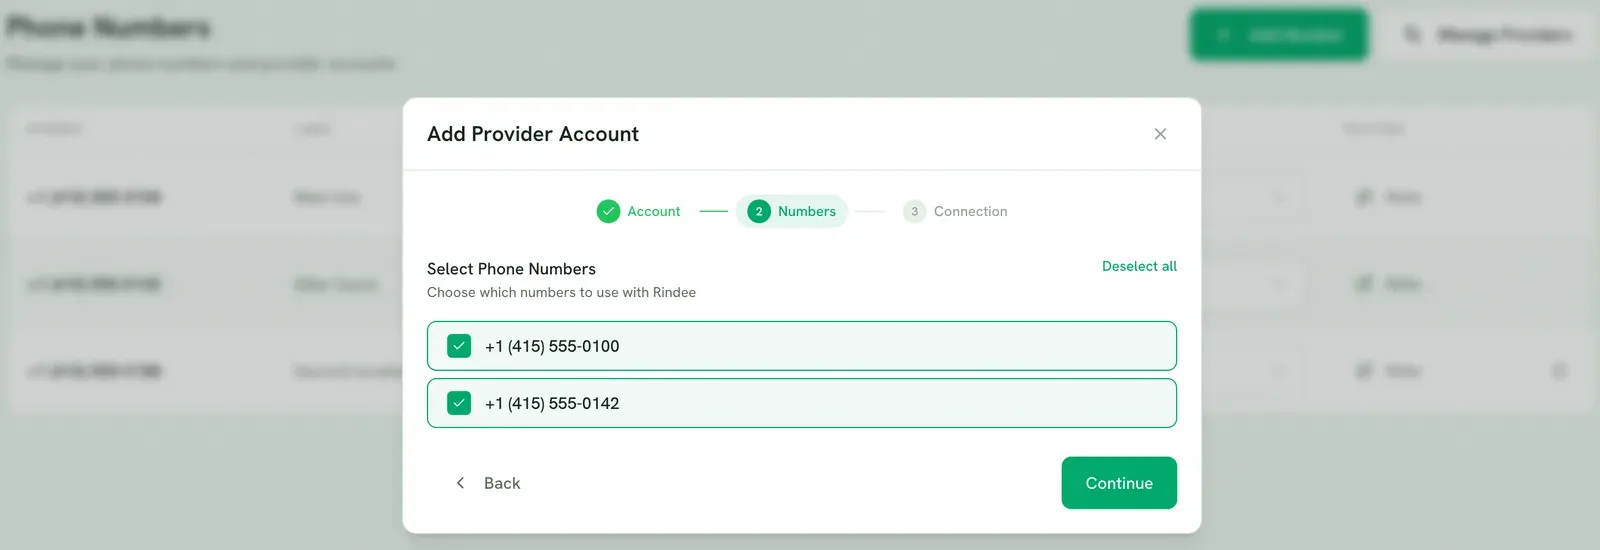
Section titled “3. Select your numbers”Rindee reads the numbers on the account and lists them. Tick the ones you want to use with Rindee, or Select all.
If the list is empty, the account has no numbers on it — buy one in the Twilio Console first, then come back.
4. Set up the SIP trunk
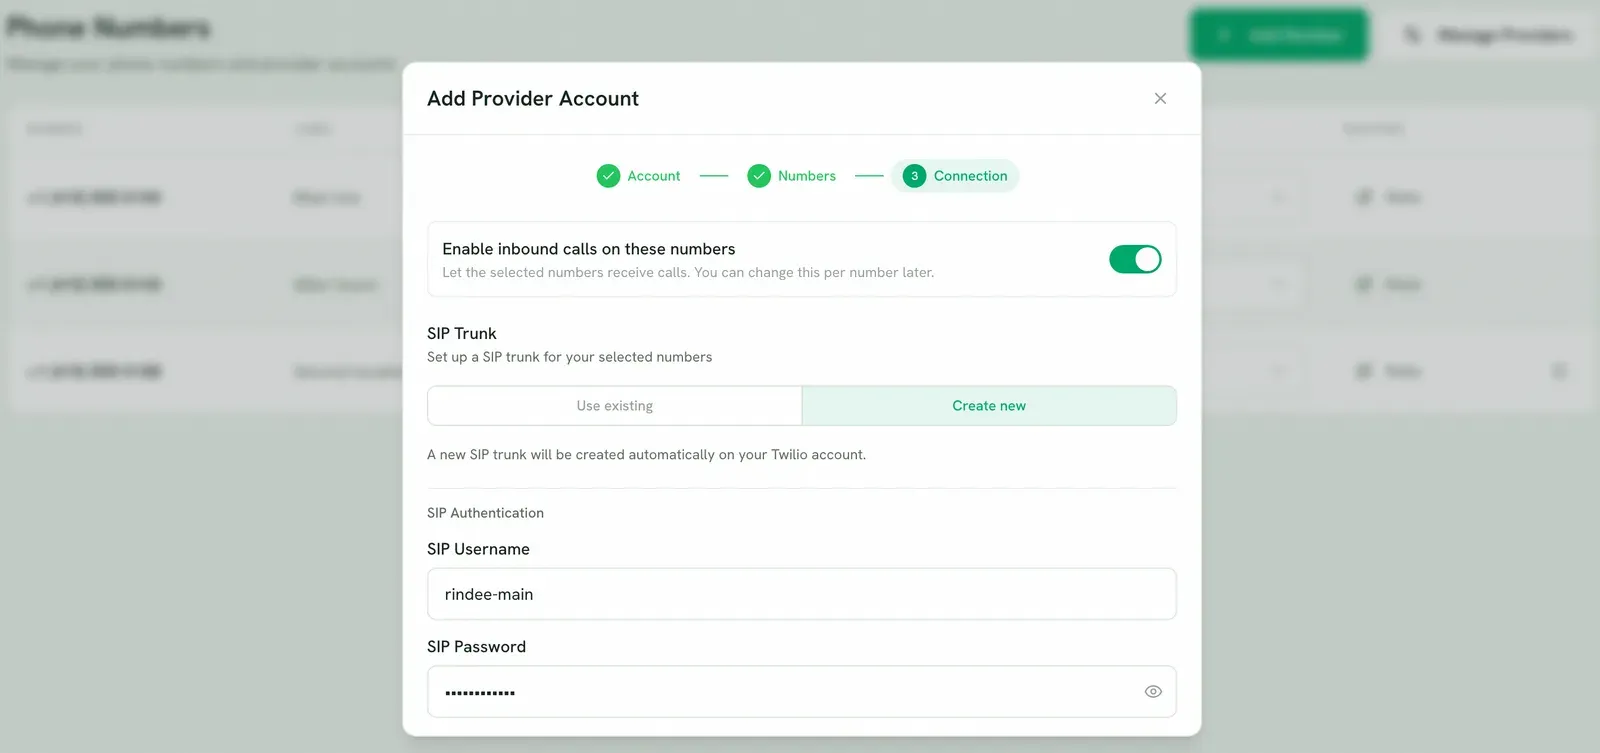
Section titled “4. Set up the SIP trunk”Rindee needs an Elastic SIP Trunk on your Twilio account. Either reuse one (Use existing, which lists your trunks and their termination URIs) or pick Create new — Rindee creates it automatically, no extra fields needed.
Then set a SIP username and password. These are the credentials Rindee uses to authenticate its outbound calls into your Twilio trunk; Rindee adds them to the trunk’s credential list. Pick anything — they’re new credentials, not your Twilio login.
Allowed destinations lists the countries your Twilio account can call today. Add every country you’ll call. Rindee saves the list to your Twilio account’s voice dialing permissions, so it applies to your whole Twilio account. Adding a country switches on its ordinary numbers only — Rindee never switches on premium or other high-risk ranges. Removing a country switches off everything in it. You can change it later with the Destinations button on the account in Manage Providers.
Press Add Provider to finish. Your numbers now appear on the Numbers page.
What Rindee configures on your Twilio account
Section titled “What Rindee configures on your Twilio account”Two things, both automatically:
- An origination URL on the trunk, named Rindee. This is what makes inbound work — a trunk without one busies out incoming calls, because Twilio has nowhere to send them.
- The credential list holding the SIP username and password you chose, so outbound calls authenticate.
Inbound is authenticated by source IP — Rindee allowlists Twilio’s published signalling ranges for you, so there’s no inbound password to configure.
5. Turn inbound on
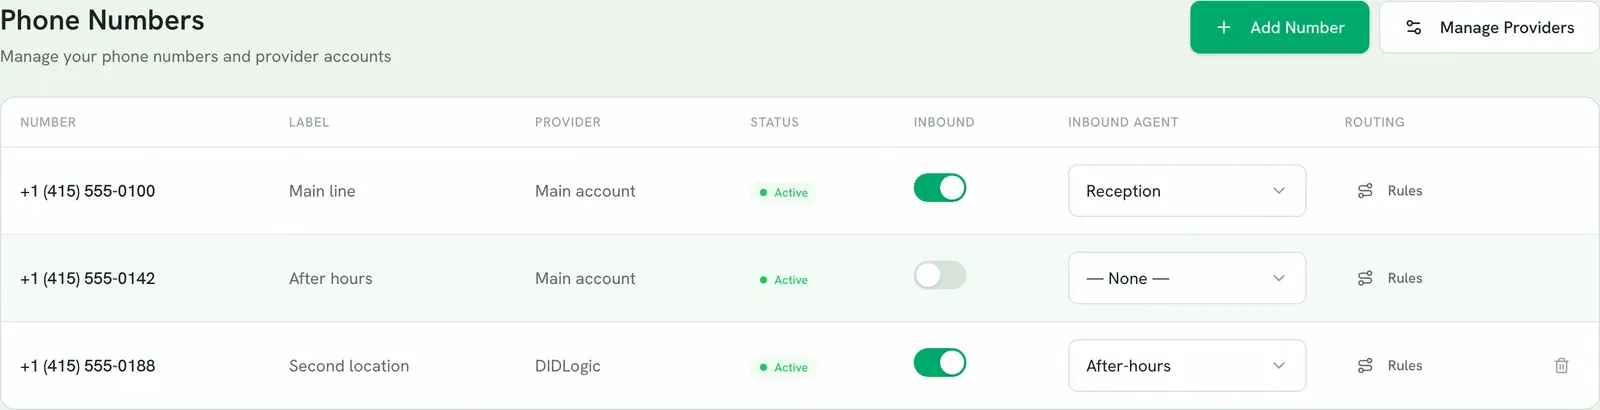
Section titled “5. Turn inbound on”New numbers start with inbound off. This is a safety default so a number never takes live calls before you’re ready.
Flip the Inbound switch on each number you want answering. Turning it off again stops inbound calls immediately; outbound is unaffected.
6. Assign an agent
Section titled “6. Assign an agent”In the Inbound agent column, pick the agent that should answer that number. One number routes to one agent.
7. Make a test call
Section titled “7. Make a test call”Ring the number from your own phone. The assigned agent should pick up with its greeting.
Troubleshooting
Section titled “Troubleshooting”“No phone numbers found on this Twilio account” The credentials are valid but the account holds no numbers. Buy one in the Twilio Console, then reopen the wizard.
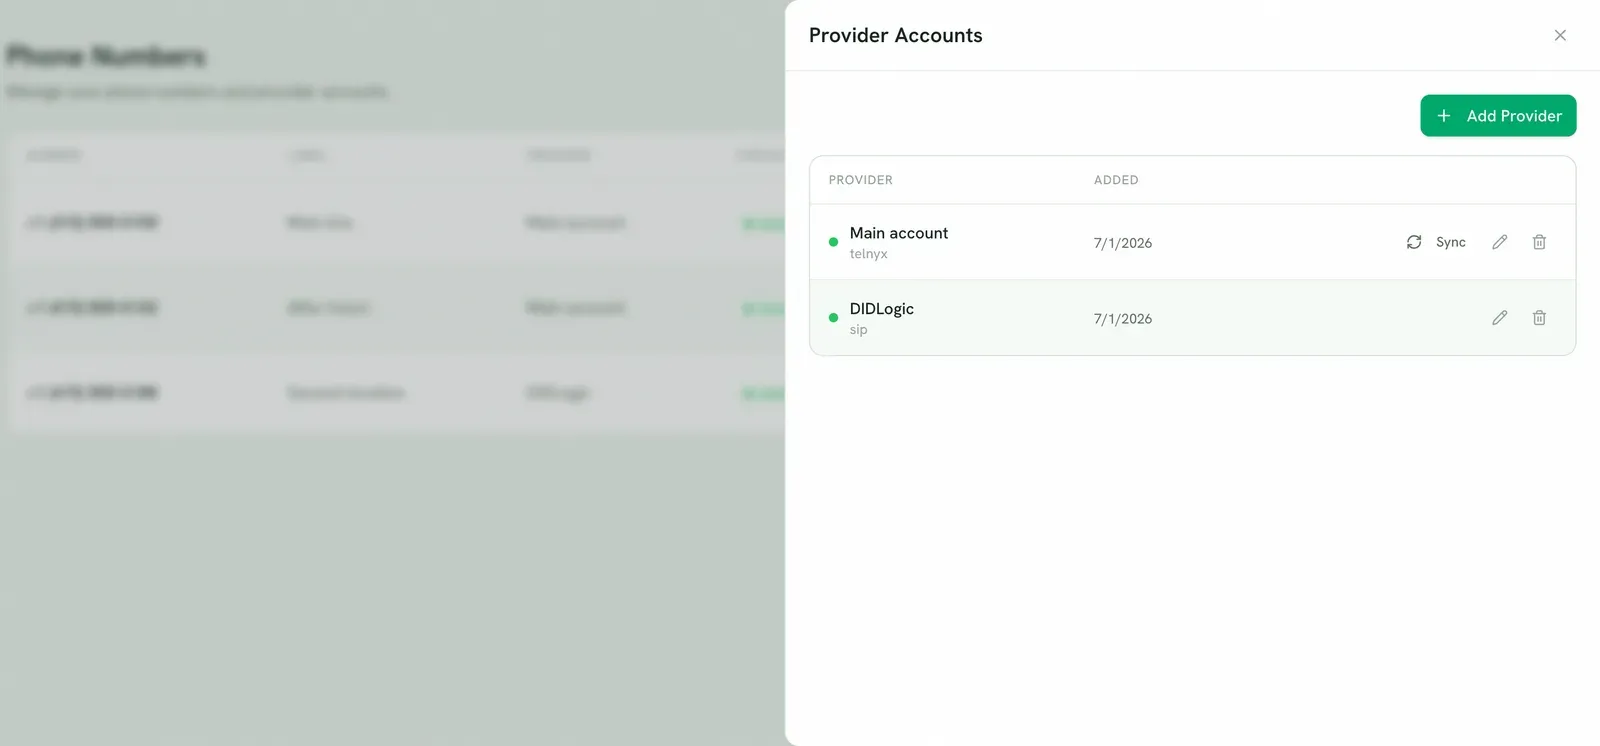
Inbound calls busy out, or ring nowhere If you connected this Twilio account before Rindee wired inbound automatically, its trunk is missing the origination URL. Open Manage Providers, find the account, and press Sync. That adds the origination URL and moves the account to source-IP inbound auth. You don’t need to re-add the numbers.
Otherwise, check the two switches that gate inbound: the Inbound toggle is on, and an Inbound agent is assigned. A number with inbound on but no agent has nothing to hand the call to.
Outbound calls fail authentication The trunk’s credential list no longer matches what Rindee holds. Reopen the provider in Manage Providers and re-enter the SIP username and password.
Calls to another country are rejected straight away That country isn’t allowed in your Twilio dialing permissions. Press Edit allowed destinations under the rejected call, or Destinations on the account in Manage Providers, and add it.
You changed numbers on Twilio Open Manage Providers and press Sync on the account to pull the current list.
Related
Section titled “Related”- Connect Telnyx — same shape, no outbound SIP credentials to choose.
- Connect a SIP trunk — any other SIP-capable carrier, configured by hand.