Connect Telnyx
Rindee is bring-your-own-carrier. Your number stays on your Telnyx account; Rindee only handles the call leg. Nothing is ported, and you can stop calls reaching Rindee with a single switch.
Telnyx is the most automated of the three paths — you paste an API key and Rindee provisions the carrier side for you. Budget about 10 minutes.
Before you start
Section titled “Before you start”- A Telnyx account with at least one number on it.
- A Telnyx API key (v2).
- The Rindee dashboard open at app.rindee.ai.
1. Create a Telnyx API key
Section titled “1. Create a Telnyx API key”In the Telnyx portal, open API Keys and create a key. Copy it — it starts with
KEY.
Rindee stores the key encrypted and uses it to read the numbers on your account and to create the SIP connection in step 4. It is never exposed back to the browser after saving.
2. Add the provider in Rindee
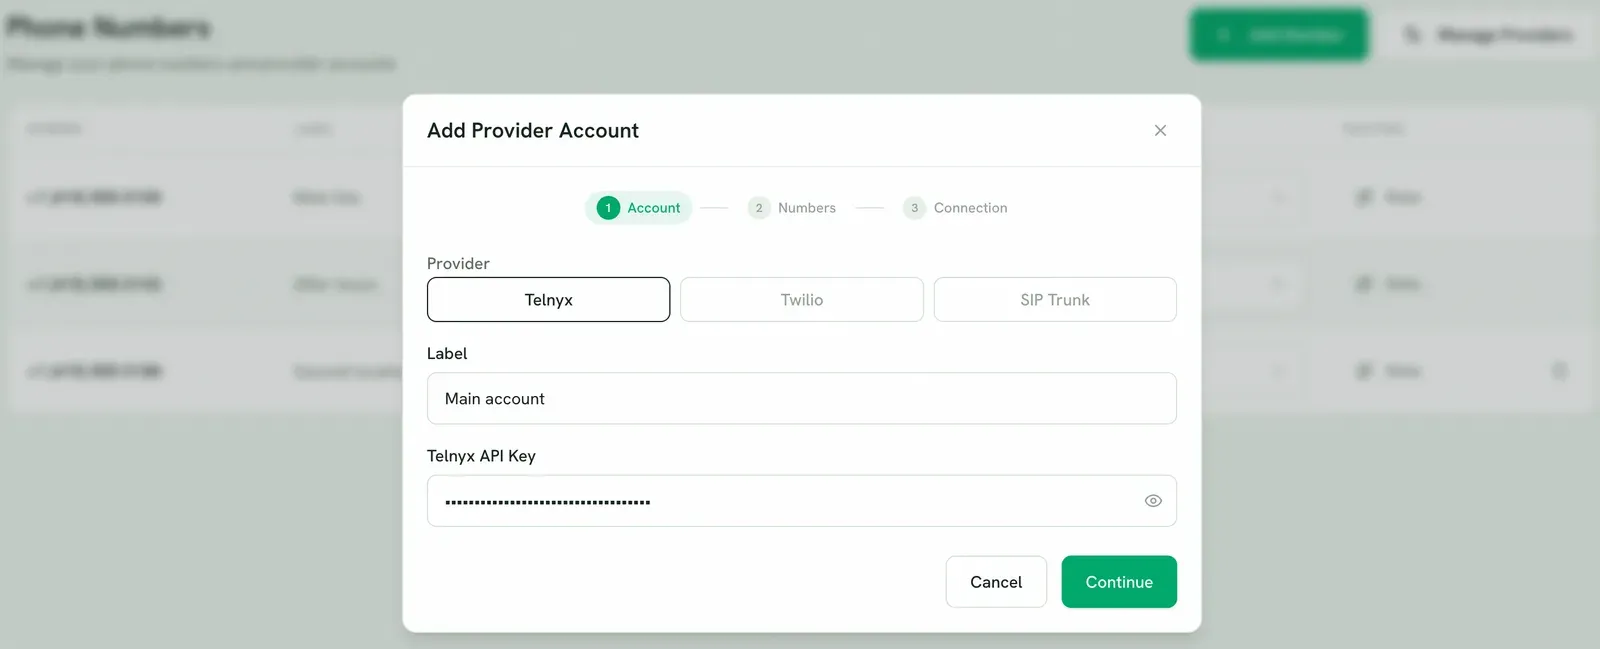
Section titled “2. Add the provider in Rindee”Open Numbers in the sidebar, then Manage Providers → Add Provider.
Choose Telnyx, give the account a Label (e.g. Main account — this is
just for your own reference when you have several), paste the Telnyx API Key,
and press Continue.
3. Select your numbers
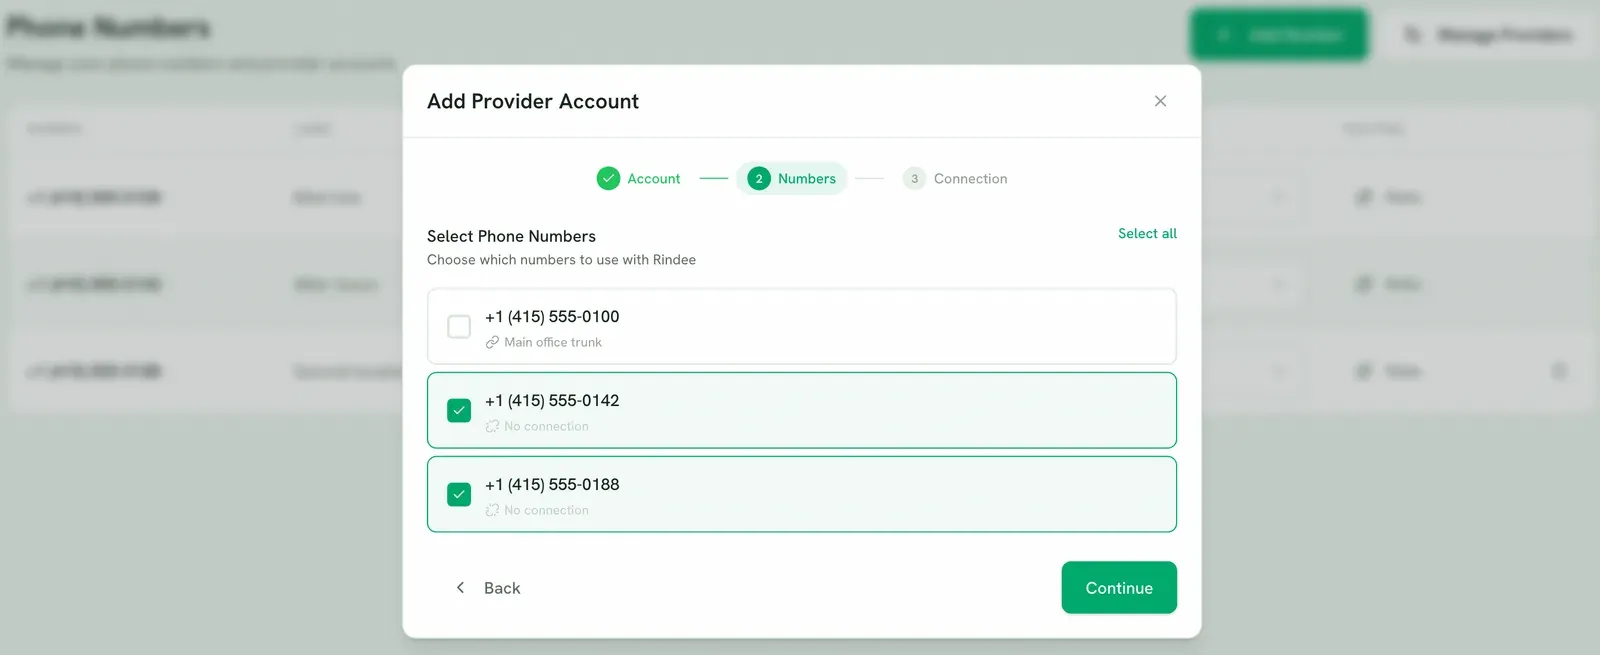
Section titled “3. Select your numbers”Rindee reads the numbers on the account and lists them. Tick the ones you want to use, or Select all.
Each row shows whether the number already belongs to a Telnyx connection:
- No connection — the number isn’t routed anywhere yet.
- A connection name — the number is already attached to something on Telnyx. Selecting it here will move its inbound routing to Rindee.
If the list is empty, the account has no numbers on it — buy or port one in the Telnyx portal first, then come back.
4. Choose a SIP connection
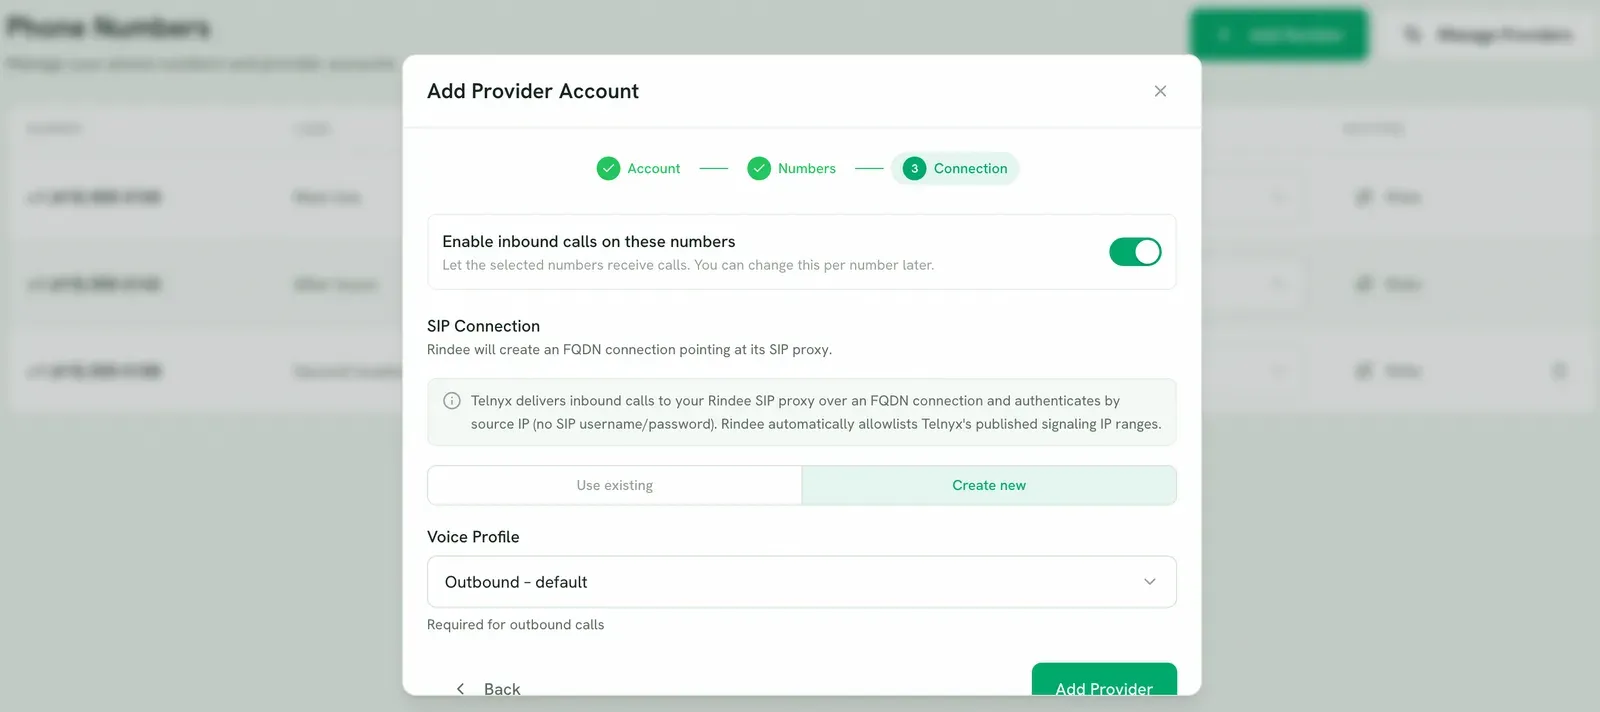
Section titled “4. Choose a SIP connection”Rindee needs an FQDN connection on your Telnyx account to receive calls. Either reuse one you already have (Use existing) or let Rindee make one (Create new).
There is no SIP username or password to set here, and that’s deliberate: Telnyx delivers inbound calls to Rindee’s SIP proxy over an FQDN connection and authenticates by source IP. Rindee allowlists Telnyx’s published signaling ranges for you.
Rindee fills in the connection’s destination and transport as part of this step — you don’t need to enter or change anything on the Telnyx side.
5. Pick an outbound voice profile
Section titled “5. Pick an outbound voice profile”A Telnyx outbound voice profile is what authorises outbound calls. Select an existing profile, or choose + Create new, name it, and press Create.
If you picked an existing connection that already has a profile attached, Rindee uses that one and won’t ask.
Once a profile is selected, Allowed destinations shows the countries it can call. A new Telnyx profile allows only the US and Canada — add every country you’ll call. Rindee saves the list to the voice profile on Telnyx, so it also applies to anything else using that profile. You can change it later with the Destinations button on the account in Manage Providers.
Press Add Provider to finish. Your numbers now appear on the Numbers page.
6. Turn inbound on
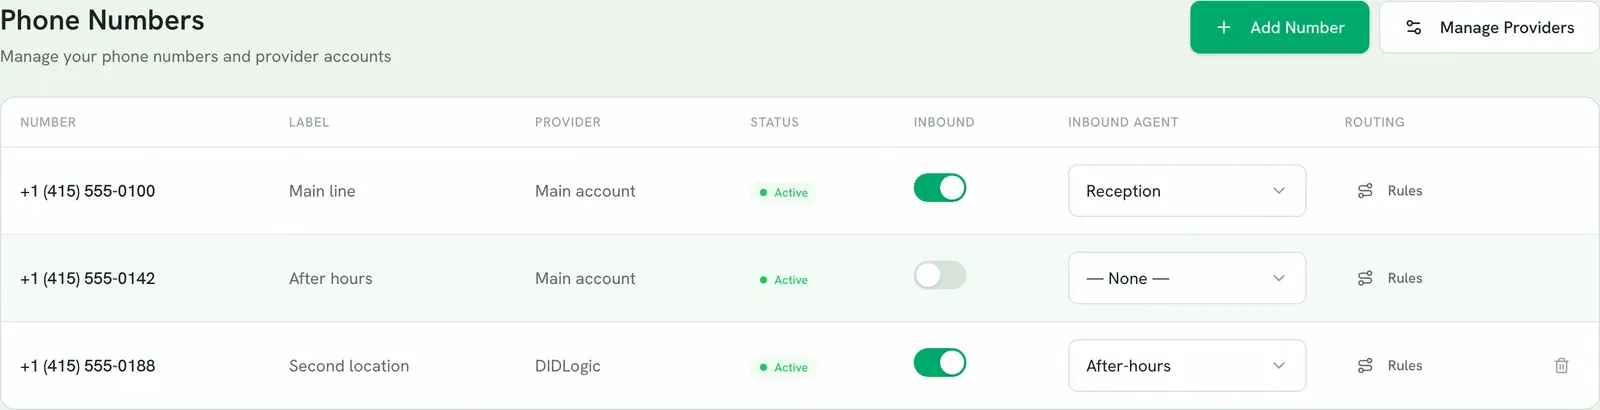
Section titled “6. Turn inbound on”New numbers start with inbound off. This is a safety default so a number never takes live calls before you’re ready.
Flip the Inbound switch on each number you want answering. Turning it off again stops inbound calls immediately; outbound is unaffected.
7. Assign an agent
Section titled “7. Assign an agent”In the Inbound agent column, pick the agent that should answer that number. One number routes to one agent.
8. Make a test call
Section titled “8. Make a test call”Ring the number from your own phone. The assigned agent should pick up with its greeting.
Troubleshooting
Section titled “Troubleshooting”“No phone numbers found on this Telnyx account” The API key is valid but the account holds no numbers. Add one in the Telnyx portal, then reopen the wizard.
The number appears in Rindee but calls don’t reach an agent Check the two switches that gate inbound: the Inbound toggle is on, and an Inbound agent is assigned. A number with inbound on but no agent has nothing to hand the call to.
Outbound calls fail The connection has no outbound voice profile attached. Reopen Manage Providers and add one.
Calls to another country are rejected straight away That country isn’t in the voice profile’s allowed destinations. Press Edit allowed destinations under the rejected call, or Destinations on the account in Manage Providers, and add it.
“Telnyx didn’t accept these destinations” International calling on Telnyx needs Level 2 account verification. Complete it in the Telnyx portal under Account → Verifications, then save the destinations again.
You changed numbers on Telnyx Open Manage Providers and press Sync on the account to pull the current list. You don’t need to re-add the provider.
Related
Section titled “Related”- Connect Twilio — same shape, but you choose the SIP credentials Rindee uses for outbound.
- Connect a SIP trunk — any other SIP-capable carrier, configured by hand.